Orion Blue Fishing Regions
How the ocean planet’s early biomes differ — fish, atmosphere, and when to move on.
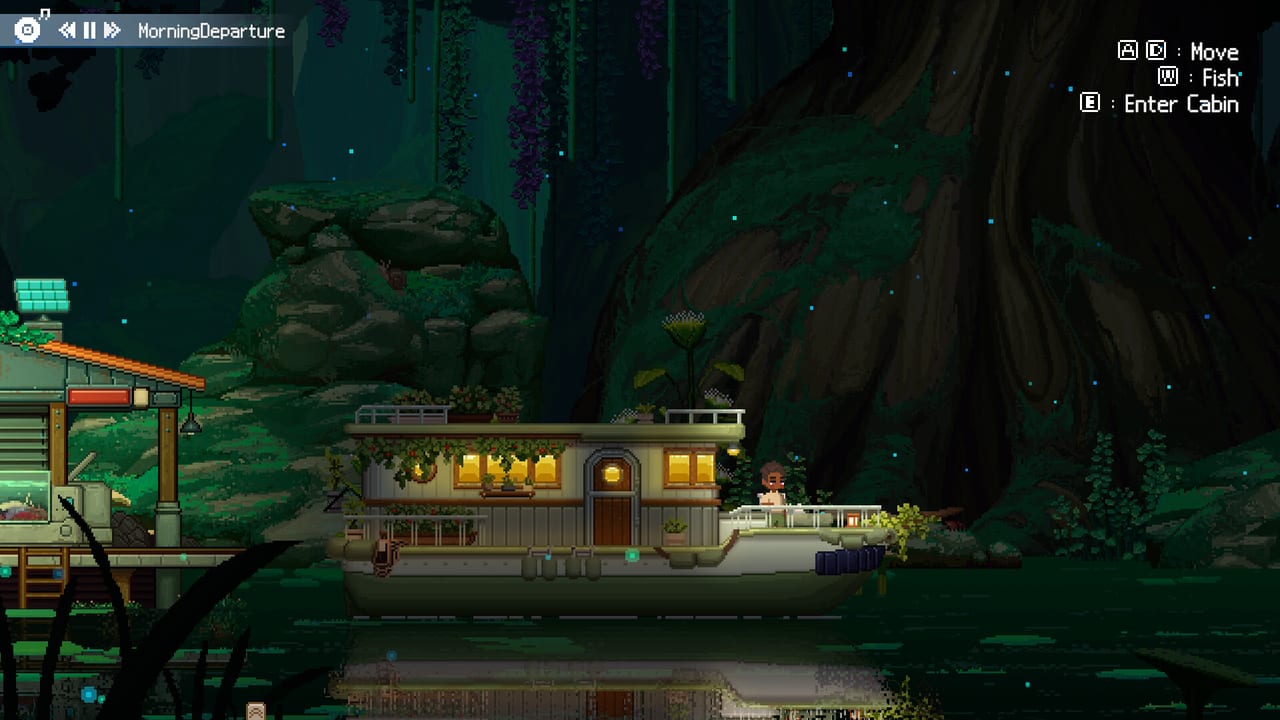
Orion Blue’s fantasy is not one dock forever. The ocean planet is split into regions — shoreline biomes with their own light, music, fish tables, and material rewards. Learning when to stay and when to sail is as important as landing a clean hook. This guide covers how regions work in the current demo slice, how to use them for encyclopedia progress, and how they connect to money and crafting goals. Pair it with How to Fish for the minigame and the fish tier list for value rankings once species names are known.
Why regions matter
Each area is a package of atmosphere and ecology. Soft tropical water does not fish like a colder platform edge. New regions reset your sense of “common” versus “rare,” change which bait feels efficient, and unlock encyclopedia pages you cannot fill at the starter pier. Decorating and friendship still happen in town, but your boat’s travel loop is what keeps the life sim from flattening into a single grind spot.
EXLIX’s trailers and demo footage lean hard on that travel fantasy: leave the settlement, cross open water, and arrive somewhere that looks and sounds different. Treat every new shoreline as both a fish table and a mood shift.
Demo scope: about three early areas
Public demo coverage consistently describes roughly three fishing areas available before the day cap. Exact labels can shift with patches, so learn them by landmark and lighting rather than memorizing a wiki-only name:
- Shallow Sea / starter settlement waters — closest docks, tutorial-friendly fish, best place to learn bite timing and red-line danger. Steam controller notes also mention village entrances at the far left of the Shallow Sea.
- Jungle Sea / second shoreline — first real variety spike; new encyclopedia entries appear quickly if you arrived with upgraded line and enough bait. Patch notes call out Jungle Sea village approach bugs that were fixed during the demo.
- Further demo waters — stronger atmosphere change and tougher or rarer catches; come here after your economy can afford missed snaps and bait burn.
If a patch opens an extra dock inside the ten-day window, the same rules apply: scout, log species, then decide whether the area is still teaching you something.
Atmosphere as a gameplay signal
Orion Blue uses music, color grade, and time-of-day lighting to sell each biome. When the soundtrack shifts, expect the fish table to shift too. Use that as a soft checklist:
- New look and new music → spend at least one focused manual session before idling.
- Same look as yesterday with no new encyclopedia pops → consider moving on.
- Weather or night lighting you have not fished yet → try a short cast set before you write the region off.
Atmosphere is not only flavor. It is how the game telegraphs that you are somewhere the starter bait meta may no longer be optimal.
Encyclopedia completion strategy
The fish encyclopedia is the long-term reason to rotate regions. A healthy demo or early-game loop looks like this:
- Arrive with rod, line, and bait equipped.
- Land a mixed sample of common catches manually so you learn bite rhythm in that water.
- Note which species are new versus duplicates.
- Sell duplicates for cash; keep or process according to crafting needs.
- When new entries slow to a crawl, leave — do not pure-farm one pier for hours unless you have a cash emergency.
Idle Mode can fill volume in a known region, but encyclopedia gaps usually need attention. Use idle to fund the trip; use manual casts to notice unfamiliar silhouettes. Details on AFK setup live in Idle Mode.
When to move on
Move to the next region when most of these are true:
- You can land fish without snapping on routine bites.
- Encyclopedia gains have slowed sharply.
- Bait costs are covered by local sales.
- You have spare materials or cash for the travel / upgrade friction the next area implies.
- The demo day counter still has room for a learning session (do not discover a new biome on the final in-game morning if you still need resident time).
Stay longer when:
- You are funding a specific gift or furniture goal and this water prints money efficiently (tier list).
- You are practicing the tug-of-war after a fishing rework patch.
- A quest or villager hint points you at a local species.
Gear and bait by region depth
Starter rods and short lines are fine for the first dock. Before the second and third demo areas, restock bait and consider line upgrades so red-line moments are recoverable. Empty bait slots fail silently for new players — reopen inventory after every shop visit. Controller players should confirm bindings on Controls before a long voyage.
Simple Fishing remains available in Settings if you want biome tourism without the mash focus. Hold-to-mash and celebration-skip options from later demo patches (around 1.1.15 community notes) also help long region tours feel less fatiguing — see How to Fish.
Sell, process, or keep — region edition
Different biomes feed different goals:
- Sell-heavy regions — use when shops or gifts are the bottleneck.
- Process-heavy regions — use when wallpaper, deck pieces, or boat parts need materials.
- Keep / log regions — prioritize when encyclopedia completion is the evening’s mission.
Write a one-line goal before you cast (“fund two gifts,” “stock decorating mats,” “three new encyclopedia entries”). Purposeless hopping still feels pretty, but goals keep the ten demo days honest.
Regions and the social calendar
Travel time is time you are not standing in a resident’s path. Combine trips: fish a new shoreline in the morning, return for afternoon dialogue, then idle near town at night. The Demo Guide and Getting Started pages explain how to share errands. Villager schedules matter more as friendship deepens — see Villagers and Romance.
Full release expectations
The November 29, 2026 launch should expand beyond the demo’s handful of waters. Expect more biomes, deeper fish tables, and longer reasons to own multiple boats (multi-boat ownership already appears in later demo QoL notes). When EXLIX publishes official region names and maps, this page will gain a structured index. Until then, navigate by landmarks, soundtrack, and encyclopedia progress.
Practical region tour for a demo evening
- Warm up with ten manual casts at the starter dock.
- Sail to the second area; fill new encyclopedia rows; sell enough to restock.
- Decorate or gift for one town block while Idle Mode runs in known water.
- Push to the furthest demo water only if days remain and gear is stable.
- End in town so friendship and shops close the loop.
That circuit teaches the planet without stranding you on a distant pier when the day cap hits.
Related reading
- How to Fish — bite, tire, release, Simple Fishing.
- Fish tier list — early money and material priorities.
- Demo Guide — day-cap planning.
- Updates — fishing reworks that change how regions feel.
The ocean planet rewards curiosity. Learn a shoreline, log its fish, then let the boat carry you toward the next color of water.
Frequently Asked Questions
Quick answers for demo and launch-week players.
How many fishing areas are in the Orion Blue demo?
Community and demo notes usually describe about three early areas. Exact counts can change with patches — explore by landmark and encyclopedia gains.
When should I leave a fishing region?
Move on when new encyclopedia entries slow down and your cash or materials goal for that water is met.
Do different regions have different fish?
Yes. Each area has its own fish table and atmosphere. That variety is the point of traveling.
Should I idle in a new region immediately?
Cast manually first to learn the local rhythm, then idle once the water is familiar. See Idle Mode.